

It is often needed that we export some data from our web application to an external document. Here, we are describing how we can export data from our spring boot application to a PDF file.
We are using the OpenPDF library for generating and exporting data to the PDF from our application. It’s an open-source java library used for creating and modifying PDF files using Java.
Let’s start coding:
Creating Spring Boot Project
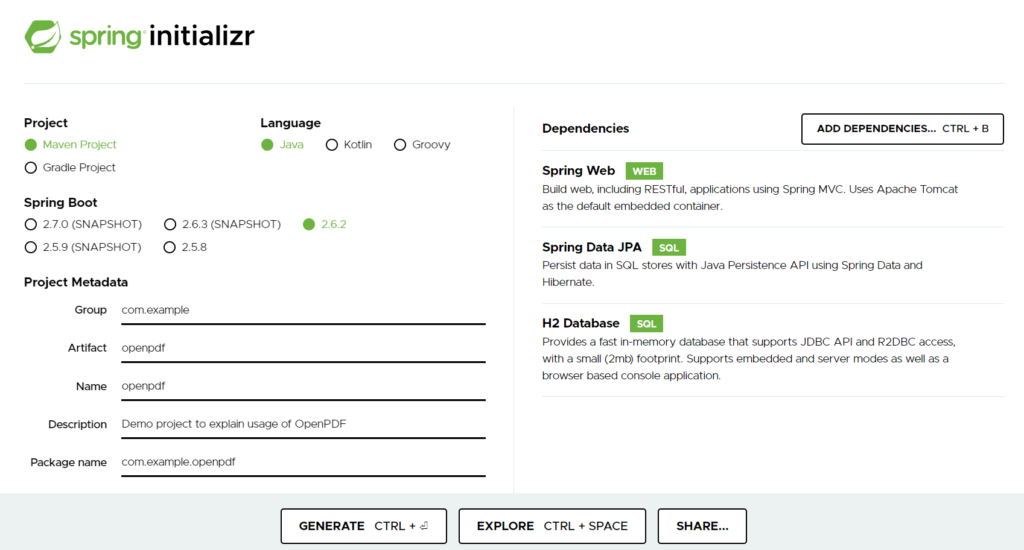
Let’s start the example by creating a spring boot project. Go to start.spring.io and generate a spring boot project.
Once the project is created by the above spring initializer API then import it into Eclipse or other preferred IDE.
If using Eclipse, Go to import in Eclipse IDE and select the option “Existing Maven Projects” to import the project. However, for other IDEs, steps should be similar.
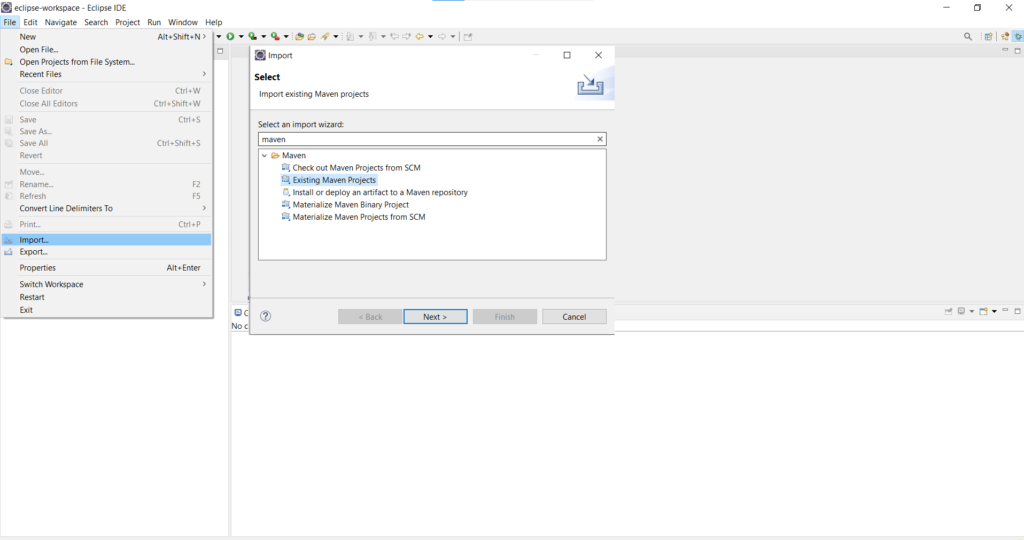
Select the downloaded folder from Spring initializer API and finally, the project is imported into the IDE.
Configure OpenPDF in Spring Boot Project
We will now add OpenPDF maven dependency in our project. Add the following dependency in pom.xml of your project:
<dependency>
    <groupId>com.github.librepdf</groupId>
    <artifactId>openpdf</artifactId>
    <version>1.3.26</version>
</dependency>
Continued Application Configuration
We need to add the following properties in our application.properties file to configure the H2 database in the application.
#H2 Database
spring.datasource.url=jdbc:h2:mem:testdb
spring.datasource.driverClassName=org.h2.Driver
spring.datasource.username=admin
spring.datasource.password=
spring.jpa.database-platform=org.hibernate.dialect.H2Dialect
Create Model Class
Here, we are creating a Student class. The Student contains an id, name, and section where the id will act as a unique identifier for every Student.
package com.example.openpdf.entity;
import javax.persistence.Entity;
import javax.persistence.GeneratedValue;
import javax.persistence.GenerationType;
import javax.persistence.Id;
@Entity
public class Student {
	@GeneratedValue(strategy = GenerationType.IDENTITY)
	@Id
	private long id;
	private String name;
	private String section;
	public long getId() {
		return id;
	}
	public void setId(long id) {
		this.id = id;
	}
	public String getName() {
		return name;
	}
	public void setName(String name) {
		this.name = name;
	}
	public String getSection() {
		return section;
	}
	public void setSection(String section) {
		this.section = section;
	}
}
Implement Repository layer
We will now create the repository layer that will mediate between our Database and Service layers. For this, we are creating an interface by extending the JpaRepository interface. We will also pass our model class in its type parameter.
package com.example.openpdf.repository;
import org.springframework.data.jpa.repository.JpaRepository;
import com.example.openpdf.entity.Student;
public interface StudentRepository extends JpaRepository<Student, Long>{
}
Implement Service Layer
Let’s create our StudentService class to implement a service layer in our application. We will currently define only one method findAllStudents in our StudentService class. This will call the findAll method of StudentRepository that will return all the students in a list.
package com.example.openpdf.service;
import java.util.List;
import org.springframework.beans.factory.annotation.Autowired;
import org.springframework.stereotype.Service;
import com.example.openpdf.entity.Student;
import com.example.openpdf.repository.StudentRepository;
@Service
public class StudentService {
	@Autowired
	private StudentRepository repo;
	public List<Student> findAllStudents() {
		return repo.findAll();
	}
    public void save(Student student) {
		repo.save(student);
	}
}
Create Utility class to generate PDF using OpenPDF
We will create a new class that will handle the PDF generation using the OpenPDF library.
package com.example.openpdf.util;
import java.io.IOException;
import java.util.List;
import javax.servlet.http.HttpServletResponse;
import com.example.openpdf.entity.Student;
import com.lowagie.text.Document;
import com.lowagie.text.DocumentException;
import com.lowagie.text.Font;
import com.lowagie.text.FontFactory;
import com.lowagie.text.PageSize;
import com.lowagie.text.Paragraph;
import com.lowagie.text.Phrase;
import com.lowagie.text.pdf.CMYKColor;
import com.lowagie.text.pdf.PdfPCell;
import com.lowagie.text.pdf.PdfPTable;
import com.lowagie.text.pdf.PdfWriter;
public class PDFGenerator {
	// List to hold all Students
	private List<Student> studentList;
	public void generate(HttpServletResponse response) throws DocumentException, IOException {
		// Creating the Object of Document
		Document document = new Document(PageSize.A4);
		// Getting instance of PdfWriter
		PdfWriter.getInstance(document, response.getOutputStream());
		// Opening the created document to modify it
		document.open();
		// Creating font
		// Setting font style and size
		Font fontTiltle = FontFactory.getFont(FontFactory.TIMES_ROMAN);
		fontTiltle.setSize(20);
		// Creating paragraph
		Paragraph paragraph = new Paragraph("List Of Students", fontTiltle);
		// Aligning the paragraph in document
		paragraph.setAlignment(Paragraph.ALIGN_CENTER);
		// Adding the created paragraph in document
		document.add(paragraph);
		// Creating a table of 3 columns
		PdfPTable table = new PdfPTable(3);
		// Setting width of table, its columns and spacing
		table.setWidthPercentage(100f);
		table.setWidths(new int[] { 3, 3, 3 });
		table.setSpacingBefore(5);
		// Create Table Cells for table header
		PdfPCell cell = new PdfPCell();
		// Setting the background color and padding
		cell.setBackgroundColor(CMYKColor.MAGENTA);
		cell.setPadding(5);
		// Creating font
		// Setting font style and size
		Font font = FontFactory.getFont(FontFactory.TIMES_ROMAN);
		font.setColor(CMYKColor.WHITE);
		// Adding headings in the created table cell/ header
		// Adding Cell to table
		cell.setPhrase(new Phrase("ID", font));
		table.addCell(cell);
		cell.setPhrase(new Phrase("Student Name", font));
		table.addCell(cell);
		cell.setPhrase(new Phrase("Section", font));
		table.addCell(cell);
		// Iterating over the list of students
		for (Student student : studentList) {
			// Adding student id
			table.addCell(String.valueOf(student.getId()));
			// Adding student name
			table.addCell(student.getName());
			// Adding student section
			table.addCell(student.getSection());
		}
		// Adding the created table to document
		document.add(table);
		// Closing the document
		document.close();
	}
}
The code above is self-explanatory with all the comments. However, let’s explain some main points one more time.
- First, we create the document by defining the page size of the document. We do this by using Document class.
- Then, we get the PdfWriter instance by providing the above-created document and OutputStream.
- Now, we need to create tables, paragraphs, headings, etc. Whatever we need in our PDF document.
- Finally, close the document.
Create Controller class
Finally, we will create our controller class that will call our PDFGeneration utility class to generate and export the data into a new PDF document.
package com.example.openpdf.controller;
import java.io.IOException;
import java.text.DateFormat;
import java.text.SimpleDateFormat;
import java.util.Date;
import java.util.List;
import javax.servlet.http.HttpServletResponse;
import org.springframework.beans.factory.annotation.Autowired;
import org.springframework.stereotype.Controller;
import com.example.openpdf.entity.Student;
import com.example.openpdf.service.StudentService;
import com.example.openpdf.util.PDFGenerator;
import com.lowagie.text.DocumentException;
@Controller
public class StudentController {
	@Autowired
	private StudentService service;
    @GetMapping("/pdf/students")
	public void generatePdf(HttpServletResponse response) throws DocumentException, IOException {
		response.setContentType("application/pdf");
		DateFormat dateFormat = new SimpleDateFormat("YYYY-MM-DD:HH:MM:SS");
		String currentDateTime = dateFormat.format(new Date());
		String headerkey = "Content-Disposition";
		String headervalue = "attachment; filename=pdf_" + currentDateTime + ".pdf";
		response.setHeader(headerkey, headervalue);
		List<Student> studentList = service.findAllStudents();
		PDFGenerator generator = new PDFGenerator();
		generator.setStudentList(studentList);
		generator.generate(response);
	}
}
Here, we are setting headers in our HttpServletResponse and setting the student list in the PDFGenerator class. This will generate the pdf and export it.
Test the Application
To test the application, you can implement a front-end form to create students or simply test the pdf export functionality by making use of CommandLineRunner.
To do this, implement CommandLineRunner in your Spring Boot main application class.
package com.example.openpdf;
import org.springframework.beans.factory.annotation.Autowired;
import org.springframework.boot.CommandLineRunner;
import org.springframework.boot.SpringApplication;
import org.springframework.boot.autoconfigure.SpringBootApplication;
import org.springframework.web.bind.annotation.GetMapping;
import com.example.openpdf.entity.Student;
import com.example.openpdf.service.StudentService;
@SpringBootApplication
public class OpenpdfApplication implements CommandLineRunner {
	@Autowired
	public StudentService service;
	public static void main(String[] args) {
		SpringApplication.run(OpenpdfApplication.class, args);
	}
	@Override
	public void run(String... args) throws Exception {
		for (int i = 0; i < 11; i++) {
			Student student = new Student();
			student.setName("Student " + i);
			student.setSection("Section " + i);
			service.save(student);
		}
	}
}
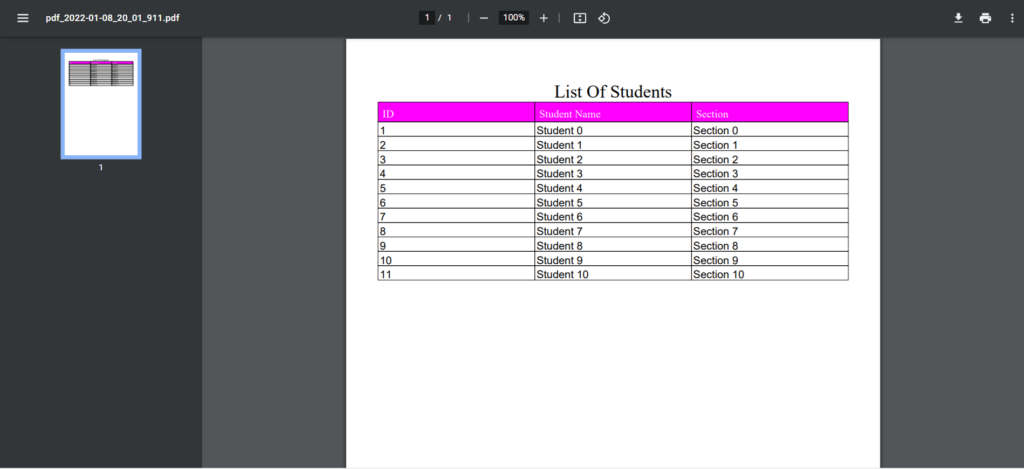
Results
This is our generated PDF. However, test your own application and see for yourself.
Conclusion
In this tutorial, we learned how we can create PDFs using the OpenPDF library. Also, how we can export data from the Spring Boot application to PDF documents.