
In my previous articles of Spring Boot, I have covered the introduction of Spring Boot , Its advantages, limitations, goals, features etc and the Key Components of the Spring Boot.
If you have not read my introduction article of Spring Boot, I would request you to take a look – Spring Boot Tutorial.
There exists following ways to create Spring Boot project. We can use any of below mentioned approach to create Spring Boot Application :
- Spring Boot Project with Maven
- Spring Starter Project Wizard
- Spring Initializr API
- Spring Boot CLI
We have already covered in previous article about How to install and configure Spring Boot in eclipse IDE and develop the Spring Boot Maven project and also How to develop Spring Boot Application using Spring Starter Project Wizard.
Now, We are going to cover the third way i.e. “Spring Initializr API“ in this article. In our next articles, we will cover remaining ways to create Spring Boot Application.
Spring Boot Project using Spring Initializr API
We are using Eclipse IDE for the below example. It is very popular IDE for java projects. You can download it from here.
Let’s get started :
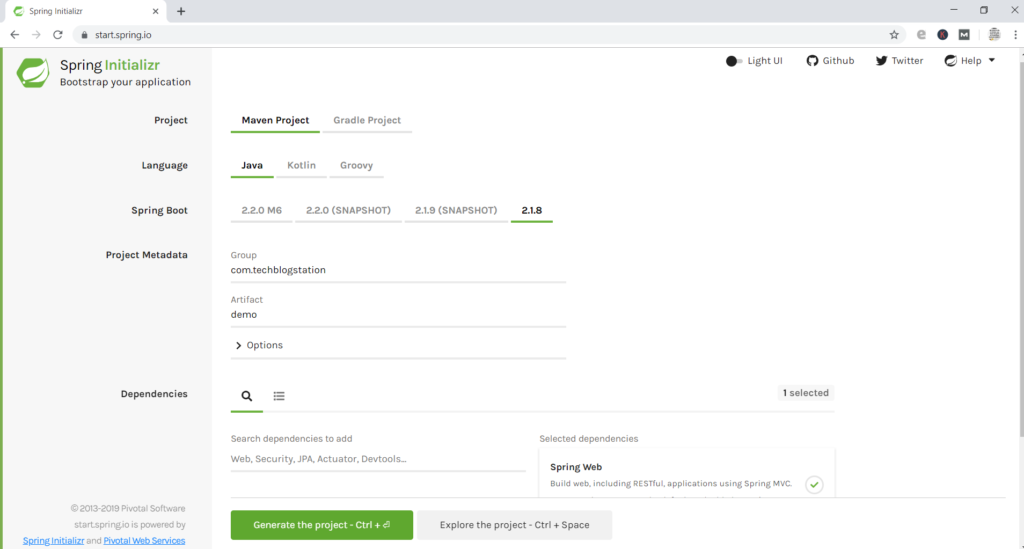
Step 1 : Generate Project using Spring Initializr
Spring Initializr is a web tool provided by The Spring team on official site. It is very easy to generate projects using this API, we just need to provide project details and dependencies and Project is ready to be downloaded.
- Go to URL : https://start.spring.io/
- Fill out the Project name, package etc.
- Select the dependency “Spring Web” from the Dependencies option.
- Click on Generate the Project.
Now the Project must have been downloaded into your System in .zip format. Extract the Project.
Step 2 : Import Generated Project into Eclipse
Go to File >> Import >> Maven >> Existing Maven Projects and click on Next :

Now Browse and Select the extracted Project and click on Finish:

Now, We can see our Project structure generated by the Spring Initializr API and created pom.xml :

pom.xml :
<project
	xmlns="http://maven.apache.org/POM/4.0.0"
	xmlns:xsi="http://www.w3.org/2001/XMLSchema-instance"
	xsi:schemaLocation="http://maven.apache.org/POM/4.0.0
        https://maven.apache.org/xsd/maven-4.0.0.xsd">
	<modelVersion>4.0.0</modelVersion>
	<parent>
		<groupId>org.springframework.boot</groupId>
		<artifactId>spring-boot-starter-parent</artifactId>
		<version>2.1.8.RELEASE</version>
		<relativePath/>
		<!-- lookup parent from repository -->
	</parent>
	<groupId>com.techblogstation</groupId>
	<artifactId>demo</artifactId>
	<version>0.0.1-SNAPSHOT</version>
	<name>demo</name>
	<description>Demo project for Spring Boot</description>
	<properties>
		<java.version>1.8</java.version>
	</properties>
	<dependencies>
		<dependency>
			<groupId>org.springframework.boot</groupId>
			<artifactId>spring-boot-starter-web</artifactId>
		</dependency>
		<dependency>
			<groupId>org.springframework.boot</groupId>
			<artifactId>spring-boot-starter-test</artifactId>
			<scope>test</scope>
		</dependency>
	</dependencies>
	<build>
		<plugins>
			<plugin>
				<groupId>org.springframework.boot</groupId>
				<artifactId>spring-boot-maven-plugin</artifactId>
			</plugin>
		</plugins>
	</build>
</project>
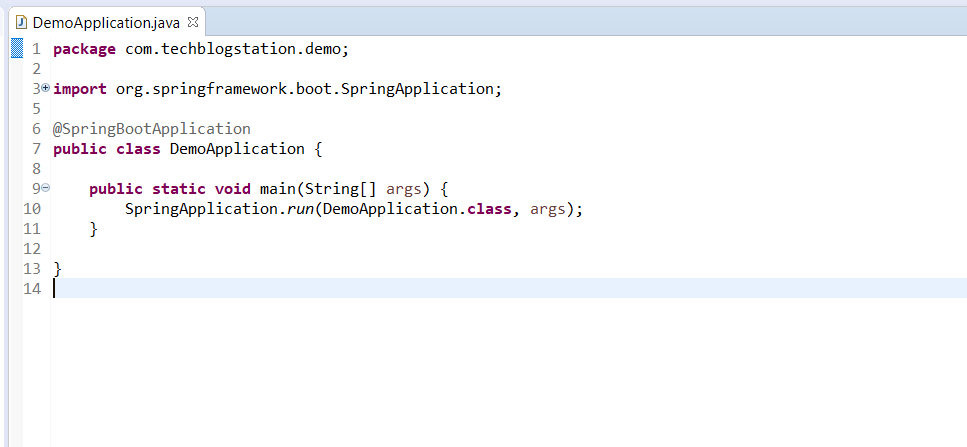
Also Spring API Initializr has also created the main app class for our Project :
Step 3 : Create the controller for Hello World Example
Now, create class inside the src/main/java package in your project :

Now,
- Add the @Controller annotation class level.
- Create a method that returns String .
- Add @RequestMapping(“/”) and @ResponseBody annotation at this method.

- @Controller indicates that class is a Controller.
- @RequestMapping annotation maps HTTP requests to handler methods of controllers.
- @ResponseBody is annotation which binds the method return value to the web response body.
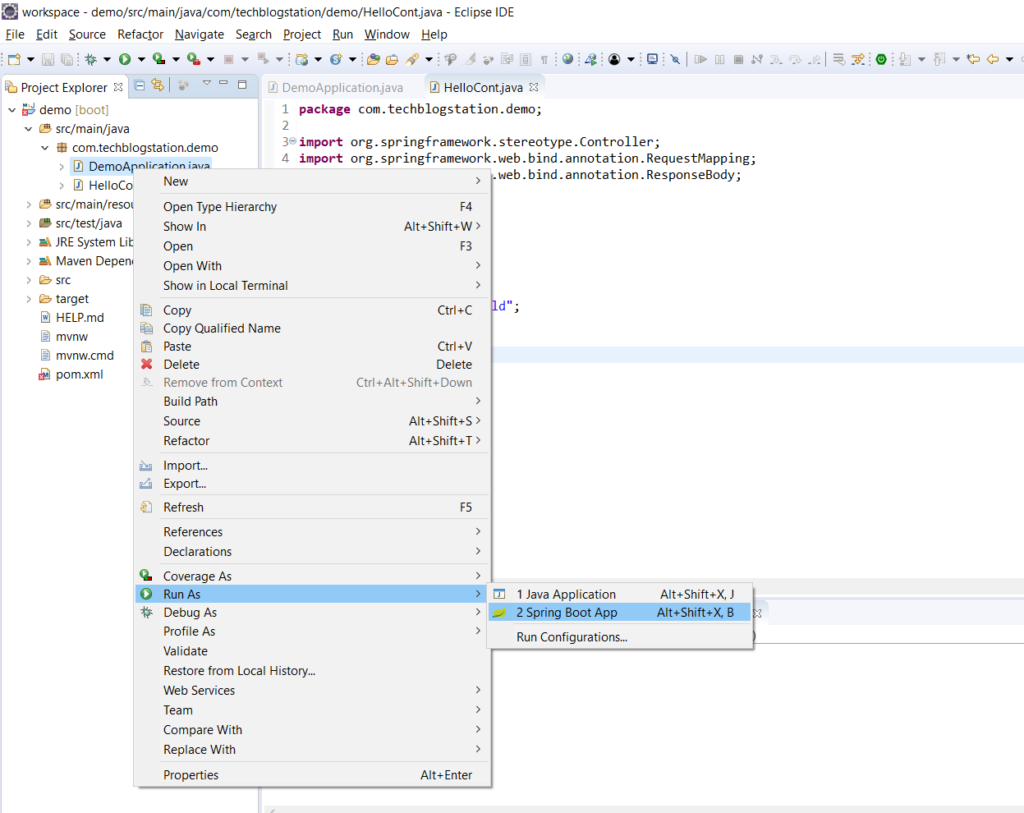
Step 4 : Running the Application
Now we have completed all tasks so it’s time to test our application by running it :
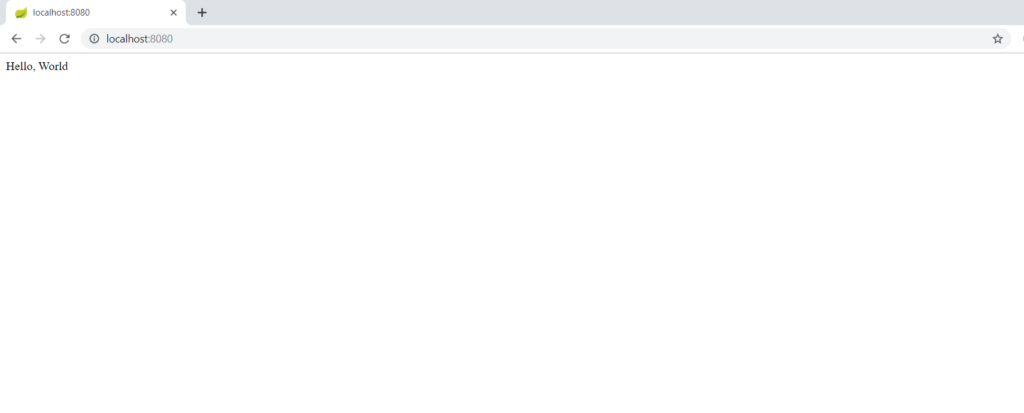
Output :
Conclusion
That’s all folks! In this article, we have learnt How to develop the Spring Boot Application using ‘Spring Boot Initializr API’.